
Getting started with Alraune
Contents

Just opened your account, or still making up your mind? This guide takes you by the hand, from creating your account to your first backup. There's no rush: you can do each step whenever you like, and nothing is lost if you stop halfway.
Good news to start with: when you open the app, it asks you up to three questions, and the rest is already set for your business. If you get stuck on a screen, the “?” at the top opens the guide to that page.
Want to look around first, with no strings attached? The demo opens without an account and is filled with made-up data: reseller, maker or artist, freelancer. Click on anything: nothing is saved.
1. Create your account
- Click "Create my account" below, or "Free trial" at the top of the page. Nothing to download: Alraune opens in your browser.
- Enter your first name and last name (both required).
- Enter your email address and choose a password of at least 10 characters, including a letter and a number. The safest option: let your password manager suggest one.
- Did a friend recommend you? Paste their code in “Referral code (optional)”. Otherwise, leave it empty.
- Open the confirmation email and click the link. Nothing there? Check your spam folder, or ask for a new one from the waiting screen.
The trial lasts 14 days, free and with no credit card. At the end, you choose a plan or you simply stop: nothing is charged automatically, and your data stays available to download.
Alraune runs in your browser, on a computer or a phone, with the same account. On a phone, add it to your home screen (iPhone: Share button › "Add to Home Screen"; Android: ⋮ menu › "Install app") and it will open like any other app.
2. Pick your account
The first time you open the app, three answers are all it takes. The first one matters most: "You are more of a…" Each answer opens a matching account:
- Reseller: you buy to resell (job lots, car boot sales, clearance stock, second-hand).
- Maker: you make what you sell (makers and artists: jewellery, candles, ceramics, sewing, illustration…).
- Freelancer: you sell services, by the session, by the hour or by the project (coaches, trainers, designers, consultants…).

Two fields? Take the Duo plan: it brings them together in one account. Running another business on its own (say, a resale shop and a candle workshop, counted apart)? Add one more business. You can change later in Settings › Your business: your data stays put. See pricing
Next comes the name of your business. Only freelancers get one more question, about their trade:
- Reseller: no third question. Your shops, the places you buy from and your categories are chosen afterwards, in the setup assistant.
- Maker: no third question either. The value of your hour ("How much is an hour of your work worth?") is set afterwards, in the setup assistant, or later in Settings. It is only a reference, next to what you earn per hour: it isn't part of the cost price of your creations.
- Freelancer: "What's your field?" You'll be offered typical services from your trade for your quotes and invoices.
Everything else is already set up for you (target margin, display) and can be changed whenever you like. At the same point, you can tick the emails you're interested in: nothing is ticked for you, and Alraune doesn't send these optional emails yet.
3. Set up your account
Right after the three answers, the setup assistant opens. It sets up your account before letting you enter anything: one screen per question, with a sentence saying why. Allow 3 to 5 minutes.
- Display: the language, day or night mode.
- Your assistant: a short introduction, and a question to ask it as a try. You can ask it for help at any time with the little mandrake at the bottom right.
- Country: in France, you see Urssaf and the French invoice mentions; elsewhere, these rules are hidden and you note your own.
- Your status: micro-entreprise or not (in France), or "My tax rules" (elsewhere).
- Your identity for invoicing (if you sell services): name, address and, in France, SIREN.
- Your resale shops (if you sell items): common places to sell are suggested, nothing is ticked for you. A shop is missing? You add it.
- Your platforms and their fees (if you sell items): the commission and payout delay of each. The figures suggested are indicative: check them.
- The places you buy from and your product categories: main families are suggested (jewellery, clothing, decor…), then their subcategories (necklaces, bracelets…). You choose, nothing is added without your approval.
- The value of your hour or your hourly rate, your starting balance and your goal for the month.
Nothing is compulsory: "Skip this step" skips a screen, "Later" closes the assistant and keeps your place. You resume it from "Getting started", or restart it from Settings › Help.
4. Follow the guided tour
Once your account is set up, a short guided tour starts on its own: the screen dims and the buttons that matter for your trade light up one by one (the menu, the main screen, the "Add" button, your results, search and help). Move on with "Next", or with the arrow keys on a keyboard.
- To see it again: the "?" at the top of the screen (on a phone: ⋮ menu › Help and guides) › "Guided tour". "Guide to this page" explains the screen you have open.
- On the dashboard, the "Getting started" checklist suggests the next thing to do, in order: your settings first, your first action next. You can fold it away or hide it once you no longer need it; if hidden, show it again in Settings › Help.
5. Your first step, depending on your account
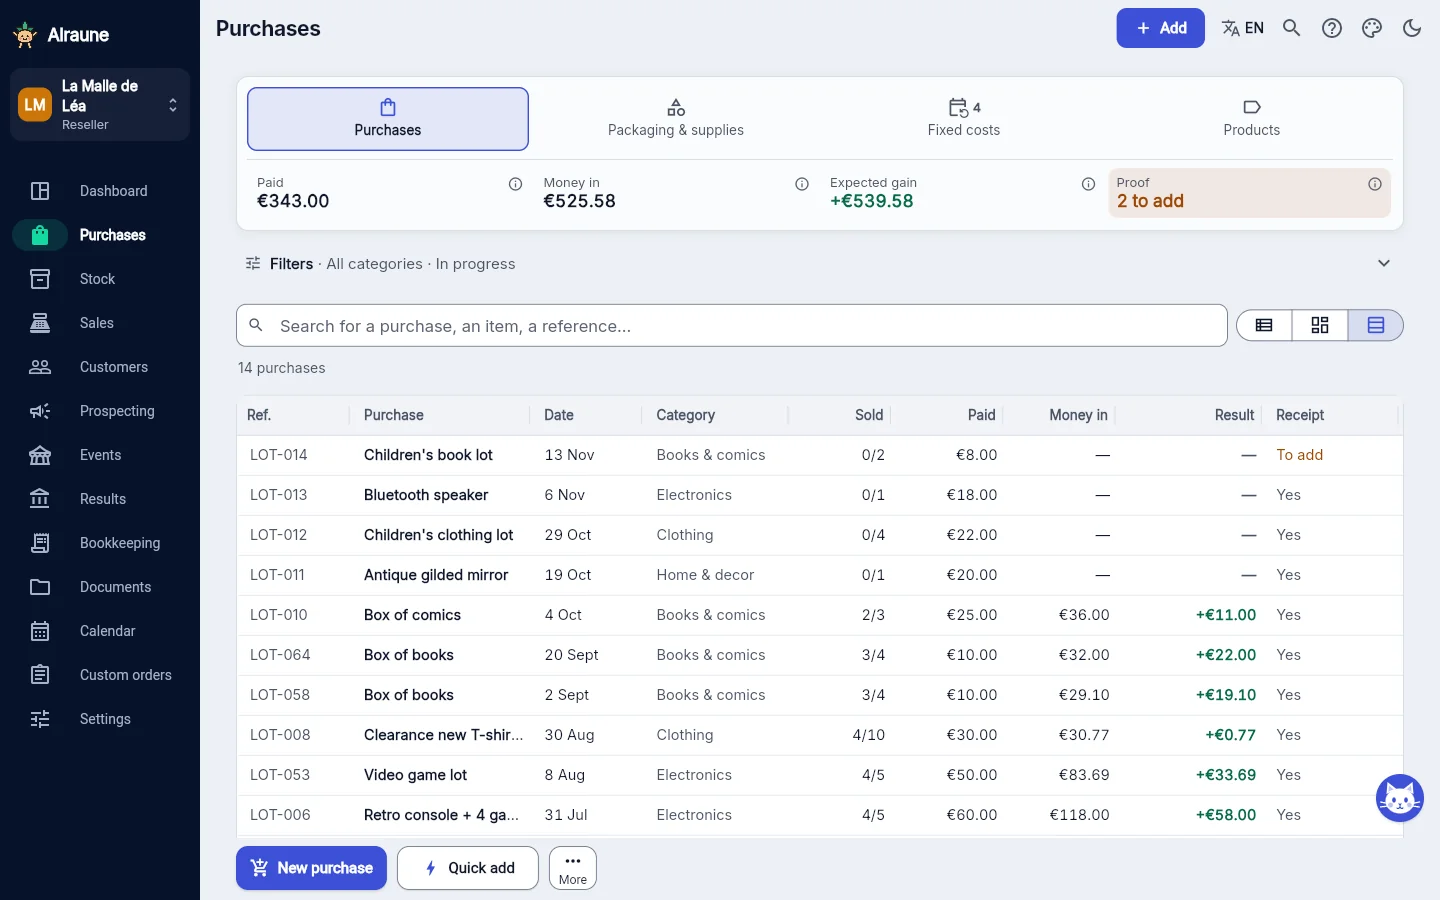
Reseller: your first purchase
- "Add" › New purchase. A purchase is a lot: a box of clothes, a bundle of books, or a single item.
- Give it a name, the price paid (postage included), a category and where you bought it. Type the place in your own words (a shop, a car boot sale, a website) or pick one you have already used. A category missing? "+ New category", right there in the list.
- Under "Items to resell", one line per item with the price you're aiming for. The price of the lot is shared between them according to their value.
- Attach the invoice or a screenshot of the order, then "Create the purchase": the items go into your Stock.
In a hurry at a car boot sale? "Quick add": a photo, the price paid, the target price, and you fill in the rest later. On the day you sell, tap the till icon on the item in your Stock and enter the price you got: the platform's fees are deducted and your margin shows before you confirm.
Maker: your first creation
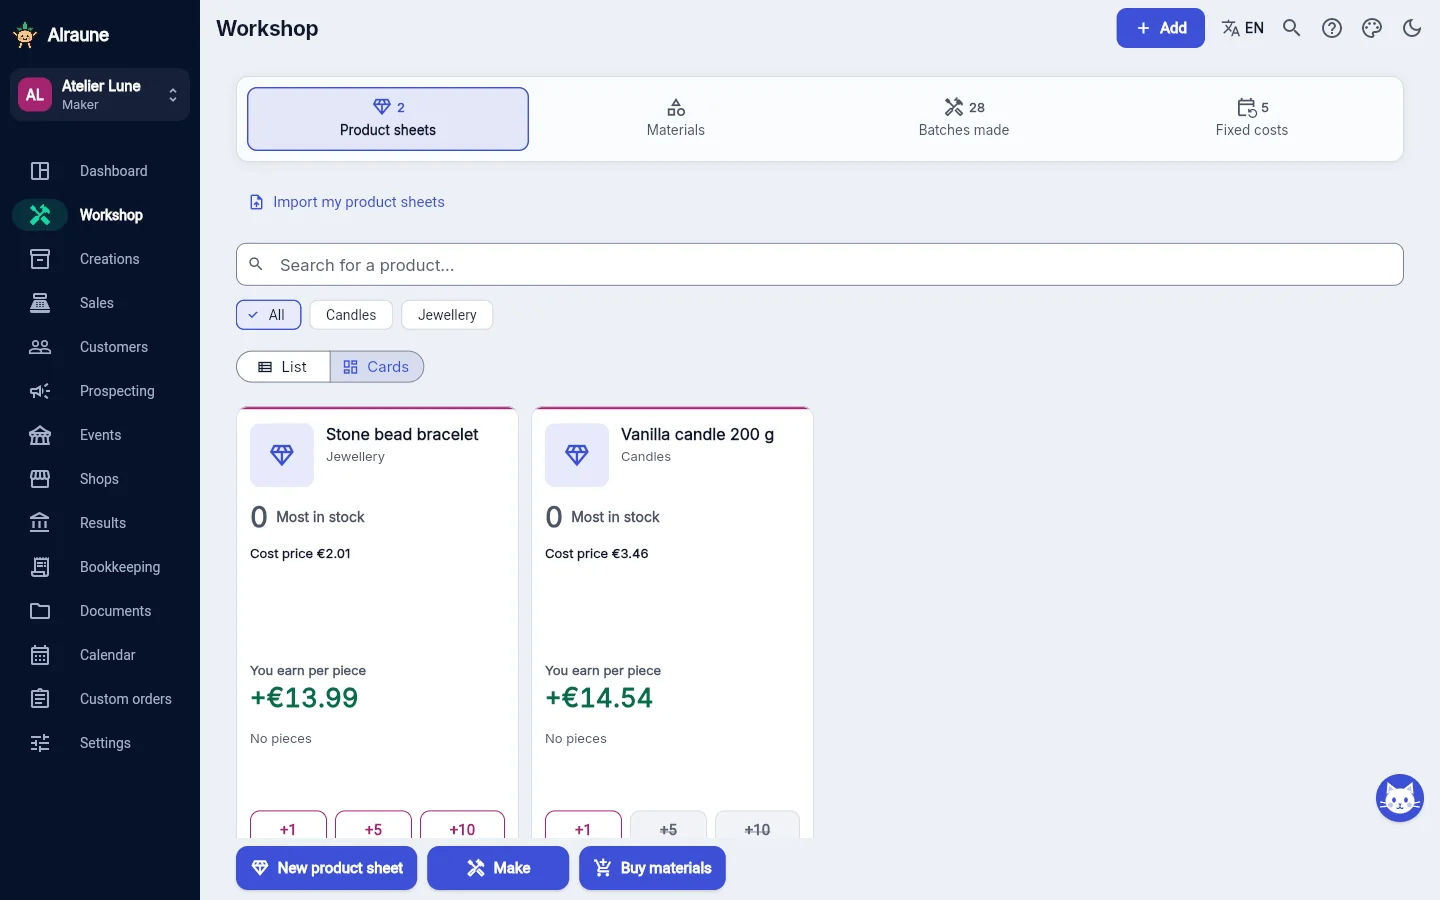
- Workshop › "Buy materials": the material, the quantity, the unit (g, ml, cm, piece…) and the price paid. The unit cost is remembered.
- "Make": the "What do you make?" screen opens. The first time, tap "New product": you create its product sheet (materials for one piece, time spent), then enter the number of pieces. The cost price shows before you save, and the materials are taken out of your stock.
- Next time, tap the product in the list: materials, time and price are already filled in, only the quantity is left. A one-off piece, without a sheet? The "One-off batch, without a product sheet" link, at the bottom of the list.
The selling price is yours to choose, based on your market: Alraune never suggests a price. As soon as you enter yours on the product sheet, you see what you earn per piece, your margin and your hourly earnings, and a price at or below the cost price is flagged. Try the free cost price calculator
Freelancer: your first quote
- Settings › Invoicing and Urssaf: your name, your SIREN and your address, printed on your documents. In France, the invoices follow French rules: the SIREN is the French business registration number, and a French sole trader (micro-entreprise) adds "EI" after their name. No number yet? Tick "My SIREN is being assigned". Business in another country? Choose it in Settings › Your business: the French details are hidden, and you enter your business ID and invoice notices in "My tax rules".
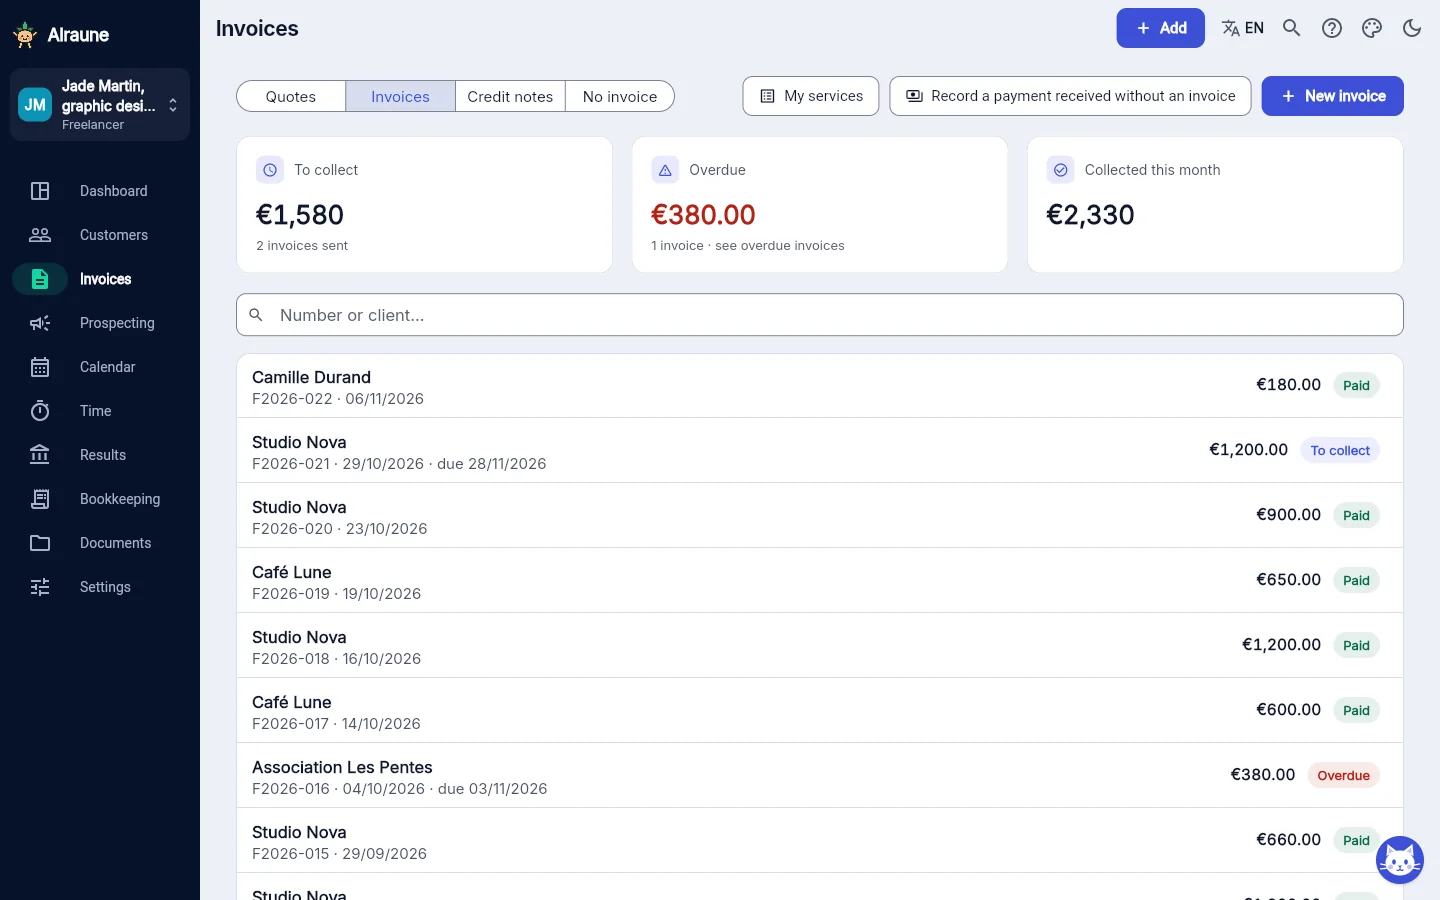
- Invoices › "My services": your services with their price and usual length. Examples from your trade are suggested.
- "Add" › New quote: the client, then the lines. "Issue the quote" gives it its number; "Download the PDF" lets you send it yourself, from your own email.
- The client accepts? "Accepted: create the invoice". They pay? "Payment received" on the invoice.
Already invoicing with another tool? Keep it, and just record the money you receive: Invoices › "Record a payment received without an invoice" (client, amount, date). Your income, your real hourly rate and "To set aside" are worked out the same way. It isn't an invoice: keep the one you made elsewhere.
6. Add your platforms and their fees
For resellers and makers. Every sale deducts its platform's fees: for your margin to be right, those fees need to be right too.
- Open Sales › "Platforms" tab. Each platform has its own card: its fees, its payout delays and what it has earned you over the period.
- Tap a card to set it up, or "Add a platform". Wherever you pick a platform (a sale, a listing), "+ Other platform" also adds the one that's missing.
- Enter the commission (in %) and the fixed fee per sale, as shown in your account on the platform. A worked example updates under the fields: with 5% and €0.70, it reads "On a €20 sale: €1.70 in fees, you get €18.30".
- Under "More options", the delivery and payout delays help you keep track of the money platforms still owe you.
Don't know the fees? No problem: leave 0 and fill them in later. A "Platform fees to check" alert will remind you, and you can correct the fees on each sale. The values suggested by default are only a guide: check them against your own account. A change applies to the sales that follow; sales already recorded keep their fees. Fees and rules of each platform
7. Import your old spreadsheet
Already tracking your sales in Excel, LibreOffice or Google Sheets? You lose nothing: they import in one go.
- Sales › "Import my past sales" (or Settings › Backup and data).
- Choose your file: .xlsx (Excel, or Google Sheets downloaded as .xlsx), .ods or .csv. Save an old .xls file as .xlsx first.
- Columns are recognised from their headings and their content: date, item, price, fees, platform… Check the ones marked "to check" using the "This column contains:" list.
- A summary shows before you confirm: number of sales, period, revenue, skipped lines and possible duplicates.
The sales keep their date and count in the results for those months, with no parcels to ship and no alerts. If the file has no purchase price, their margin is marked "unknown cost". Picked the wrong file? "Undo this import" removes it all at once, as long as you haven't changed anything in it.
Your current stock is imported separately, as a CSV (Settings › Backup and data › "Import stock (CSV)"). On the Freelancer side, it's your client list that you import ("Import clients (CSV)"). Either way, you choose the file yourself: Alraune doesn't connect to the platforms or to your bank.
8. Read your figures
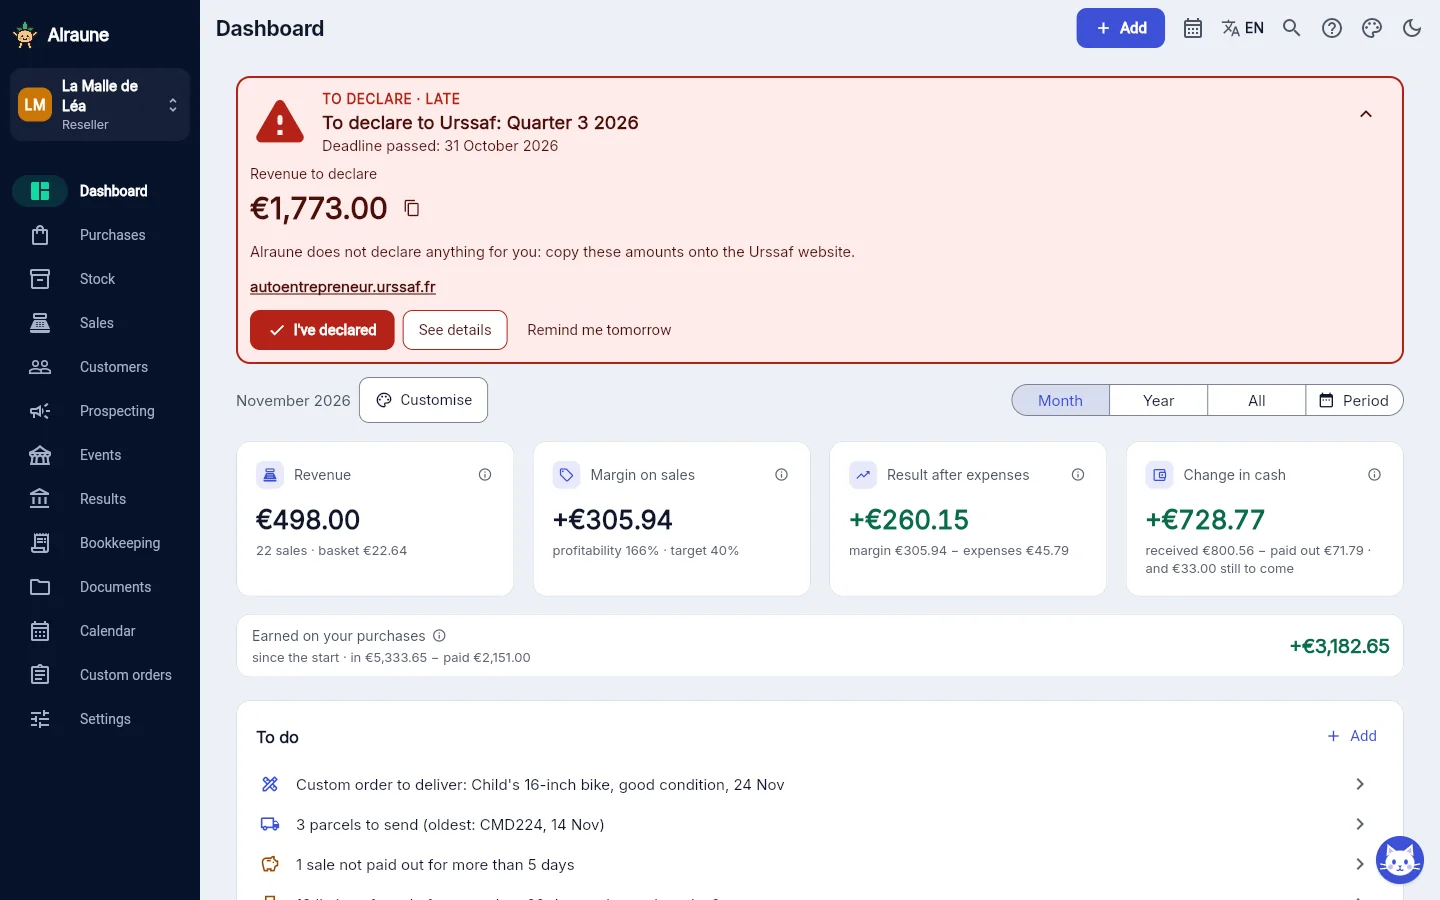
The dashboard (the home screen) sums up the period chosen at the top of the screen: month, quarter, year, or two specific dates.
- Reseller: your revenue, your margin on sales (fees and shipping deducted) and "Earned on your purchases". Until a lot is completely sold, the margin on its sales is "estimated": it becomes more precise with every sale.
- Maker: what you earn per hour, on the pieces sold, after materials and costs. Compare it with the value you give your hour.
- Freelancer: what you've collected, your real hourly rate (unpaid time included) and "To set aside" for Urssaf (French social contributions), income tax and the CFE (a French local business tax). These are estimates, based on the rates you enter.
The Results screen breaks everything down month by month: revenue, margin on sales, result after expenses and cash. For accurate cash figures, enter your starting balance once.
9. Set up your alerts
Alraune lets you know in "To do", on the dashboard: parcels to ship, listings that aren't selling, materials running low, late invoices, an Urssaf declaration coming up… Too many alerts, or not enough?
- Settings › Notifications and alerts: each alert has its own switch. Switched off, it disappears from "To do"; your figures don't change.
- An alert with a threshold (items listed for more than 60 days, materials below 15% of the quantity bought…) can be adjusted in a tap. "Reset everything to default" takes you back to the original settings.
- Further down, Emails: tick only what interests you. Alraune doesn't send these optional emails yet; your choice will be respected once it does. Essential emails (address confirmation, password, account security, subscription invoice) are always sent.
10. Back up and protect your account
Your data is stored online, on servers in Europe: you'll find it on all your devices. Keeping a backup of your own is still a good habit.
- Settings › Backup and data › "Full backup (.zip)": all your data and receipts in one file. "Restore" loads it back. A backup reminder can suggest it from time to time.
- Your photos are shrunk automatically when you add them: sharp and readable, without their GPS location. In the same place, "File storage" shows how much space you're using, and "Shrink existing photos" lightens the older ones (the originals are replaced: make a backup first if you want to keep them full size).
- Settings › Your account: "Log out of all devices" if you've lost a phone or forgot to log out somewhere. To delete your account, you're asked for your password again: nothing gets deleted by mistake.
- Sharing your calendar with Google, Apple or Outlook? Anyone who has the link can see it: the "Initials only" option replaces your clients' names with their initials.
Stuck?
- The app's "?" answers practical questions ("How do I record a sale?") and opens the right screen. The magnifying glass finds settings too: type "fees" or "backup".
- The selling tutorials (Vinted, eBay, Etsy…) and the free calculators go into the basics: fees, margin, cost price.
- A question with no answer? Write to us at contact@alraune.fr; we usually reply within 48 hours.
Ready to start?
14 days to try everything, free and with no credit card. Then you choose your plan, or you stop.